That heart-sinking moment when your phone or portable speaker, fresh from a beach day, starts sounding muffled or crackly—it’s likely a tiny grain of sand causing the trouble. Sand, a seemingly harmless natural element, can be a formidable adversary to the delicate mechanics of your device’s speaker ports. These minuscule particles can obstruct sound pathways, degrade audio quality, and, if left unchecked, potentially lead to permanent damage. This guide will walk you through a series of safe and effective methods to dislodge stubborn sand from your speaker ports, helping you restore crystal-clear audio, along with crucial prevention tips and advice on when to seek professional assistance.
Why Sand is a Menace to Your Speaker Ports
Speaker ports, whether on a smartphone, tablet, or a dedicated portable speaker, are intricate components designed for sound transmission. When sand infiltrates these tiny openings, it can wreak havoc in several ways. The most immediate effect is often muffled or distorted audio, as the sand particles physically block the sound waves from exiting the speaker grille properly. More alarmingly, these abrasive grains can scratch the delicate speaker membrane itself, potentially tearing it and causing irreversible damage that impacts sound quality.
Beyond the speaker component, sand can also migrate into adjacent ports like charging or headphone jacks, disrupting electrical contacts and leading to charging failures or connectivity issues. If moisture is also present, sand can accelerate corrosion or even cause short circuits within the device’s sensitive internal circuitry. Understanding these risks underscores the importance of prompt and careful sand removal to protect your investment and preserve your audio experience.
Essential Tools for Speaker Sand Removal
Tackling sand in your speaker ports requires a gentle touch and the right set of tools. Avoid anything made of metal, as these can easily scratch or damage the delicate components. Instead, gather the following:
- Soft-Bristled Brush: A brand-new, clean toothbrush or a small, soft-bristled paintbrush is ideal for gently sweeping away surface sand.
- Compressed Air Can: This can be effective for dislodging loose particles, but must be used with extreme caution to avoid pushing sand deeper or damaging components with excessive pressure.
- Adhesive Putty: Products like Blu-Tack or specialized electronics cleaning gel can pick up fine dust and sand without leaving residue.
- Wooden Toothpick or Plastic Dental Pick: Use with the utmost care, these can be useful for very carefully nudging visible, larger sand grains near the edge of the port. Never force them deep inside.
- Microfiber Cloth: For wiping down the device and ensuring no residue is left.
- Bright Light Source: A flashlight or headlamp will illuminate the port, making individual sand grains easier to spot.
- High-Frequency Sound/Vibration App or Video: Certain apps or YouTube videos produce specific sound frequencies designed to vibrate out water and fine debris.
Step-by-Step Guide: Ejecting Sand from Speaker Ports
Follow these steps meticulously to safely remove sand and restore your speaker’s clarity. Remember, patience and a gentle approach are key.
Step 1: Preparation is Key
|
Our Picks for the Best Bluetooth speaker in 2026
As an Amazon Associate I earn from qualifying purchases.
|
||
| Num | Product | Action |
|---|---|---|
| 1 | Portable Bluetooth Speaker, IPX7 Waterproof Wireless Speaker with 20W Loud Stereo Sound, 15H Playtime & Beat-Synced RGB Light, Small Outdoor Speaker for Shower, Pool, Beach, Hiking and Gifts |

|
| 2 | JBL Go 3 - Portable Mini Bluetooth Speaker, big audio and punchy bass, IP67 waterproof and dustproof, 5 hours of playtime, speaker for home, outdoor and travel (Black) |
|
| 3 | Anker Soundcore 2 Portable Bluetooth Speaker, 12W Stereo Sound with Deep Bass, IPX7 Waterproof, 24-Hour Playtime, Built-in Mic, for Home, Outdoors & Travel |
|
| 4 | Soundcore Boom 2 By Anker, Outdoor Speaker, 80W, Subwoofer, BassUp 2.0, 24H Playtime, IPX7 Waterproof, Floatable, RGB Lights, USB-C, Custom EQ, Bluetooth 5.3, Portable for Camping and Beach - Black |
|
| 5 | BolaButty Bluetooth Speaker with HD Sound, Portable Wireless, IPX5 Waterproof, Up to 20H Playtime, TWS Pairing, BT5.3, for Home/Party/Outdoor/Beach, Electronic Gadgets, Birthday Gift (Black) |
|
| 6 | Monster S620 Bluetooth Speaker, Wireless Portable Outdoor Bluetooth Speakers, 60W True Wireless Stereo IPX8 Waterproof, Dual PairingBluetooth 5.4 Built-in Mic, Perfect for Home, Blue |
|
| 7 | JBL Go 4 - Ultra-Portable, Waterproof and Dustproof Bluetooth Speaker, Big JBL Pro Sound with Punchy bass, 7-Hour Built-in Battery, Made in Part with Recycled Materials (Blue) |
|
| 8 | JBL FLIP 5, Waterproof Portable Bluetooth Speaker, Black, Small |
|
| 9 | JBL Charge 6 - Portable Waterproof & Drop-Proof Bluetooth Speaker, Bold JBL Pro Sound with AI Sound Boost, 28Hrs of Playtime, Built-in powerbank & Comes with a Sturdy/Removable Carrying Strap (Black) |
|
| 10 | Bose SoundLink Flex Bluetooth Speaker (2nd Gen) - Portable Outdoor Speaker with Hi-Fi Audio, Waterproof and Dustproof, USB-C, Up to 12 Hours Battery Life, Twilight Blue - Limited Edition Color |
|
Before you begin any cleaning, turn off your device completely and disconnect it from any power source. This prevents accidental short circuits and protects the device from potential damage during the process. Work in a brightly lit area to ensure you have a clear view of the speaker ports and any trapped sand. A magnifying glass can also be helpful for spotting those tiny, elusive grains.
Step 2: Gentle Tapping and Shaking
Often, the simplest methods are the most effective. Hold your device with the affected speaker port facing downwards. Gently tap the back of the device against the palm of your hand or a soft, padded surface. Gravity can help dislodge loose sand particles, allowing them to fall out naturally. Continue tapping for a minute or two, rotating the device slightly to encourage sand from different angles to escape.
Step 3: The Power of Vibration (Sound Method)
High-frequency sound waves can create vibrations that effectively dislodge fine particles like sand and dust from speaker grilles. There are various apps available (e.g., “Fix My Speaker” for phones) or YouTube videos that generate these specific frequencies. To use this method:
- Set your device’s volume to maximum.
- Place the device on a flat surface with the speaker facing downward.
- Play the designated sand-removal frequency for several minutes without interruption.
- Gently tap the device periodically to aid the sand’s exit.
This technique is often recommended as a safe, non-invasive first line of defense for embedded particles.
Step 4: Using Compressed Air (With Caution)
Compressed air can be a powerful tool, but misuse can cause more harm than good. Always use it with caution:
- Hold the compressed air can upright to prevent propellant from spraying out, which can damage internal components.
- Never spray at full force directly into the port. Instead, use short, controlled bursts.
- Hold the nozzle a few inches away from the speaker port, not directly against it.
- Angle the spray to encourage sand to exit, rather than pushing it deeper into the device.
Avoid blowing air into the ports with your mouth, as this can introduce moisture and cause further issues.
Step 5: Soft Brushing and Picking
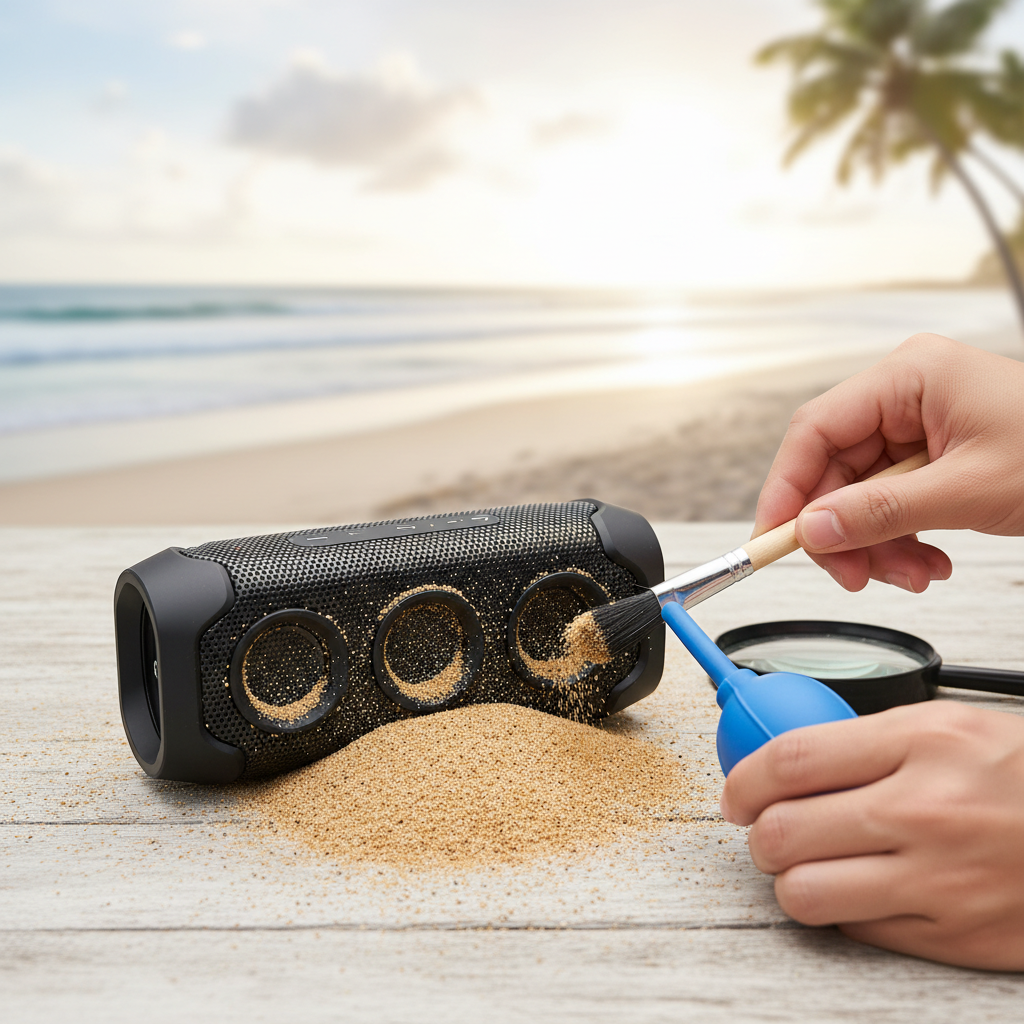
For sand that’s visible on the surface or just inside the grille, a soft-bristled brush can be very effective. Gently sweep the brush across the speaker grille to dislodge superficial grains.
For larger, stubborn grains that are clearly visible at the very edge of the port, you can very carefully use a wooden toothpick or a plastic dental pick. The key here is extreme gentleness. Never force the pick deep into the port, as this can push sand further in, scratch the speaker membrane, or damage internal wiring. Use only the tip to gently pry or scoop out the visible sand. Many experts advise against inserting anything into the speaker grille to prevent pushing sand further in.
Step 6: Adhesive Putty for Fine Grains
Adhesive putty, like Blu-Tack or specialized cleaning gels, can effectively lift fine sand particles from textured surfaces without leaving residue.
- Take a small piece of putty and knead it until it’s soft and pliable.
- Gently dab the putty onto the speaker grille and into the small crevices.
- Do not press hard or leave the putty on for too long, as you don’t want to embed it.
- Pull the putty away slowly. The sand particles should adhere to the putty. Repeat this process until no more sand is visible.
Step 7: Final Inspection and Testing
Once you’ve tried the above methods, use your flashlight to perform a thorough final inspection of the speaker ports. Ensure no visible sand remains. Once satisfied, turn your device back on and test the speaker at a low volume first, gradually increasing it. Listen for any lingering distortion or muffling. If the sound is clear, congratulations—you’ve successfully removed the sand!
Do’s and Don’ts of Speaker Port Cleaning
Adhering to these guidelines will help ensure you clean your speaker ports safely and effectively without causing further damage.
DO:
- Turn off your device before attempting any cleaning.
- Use soft, non-abrasive tools like brushes, adhesive putty, or high-frequency sounds.
- Be gentle and patient throughout the cleaning process.
- Use short, controlled bursts of compressed air from a safe distance.
- Work in a well-lit area to clearly see the affected area.
DON’T:
- Never use metal objects (needles, paper clips) inside speaker ports, as they can easily scratch or short-circuit components.
- Avoid inserting any sharp object deep into the speaker grille; this risks pushing sand further in or piercing the speaker membrane.
- Do not blow directly into the port with your mouth, as your breath contains moisture that can cause corrosion.
- Refrain from using liquid cleaners, solvents, or lubricants like WD40. These can damage internal electronics or leave a sticky residue that attracts more debris.
- Do not use high-pressure air compressors meant for workshops; their force is too strong for delicate electronics.
Preventing Sand Ingress: Proactive Measures
The best way to deal with sand in your speaker ports is to prevent it from getting there in the first place. A few simple habits can save you a lot of hassle.
One of the most effective solutions is using port plugs. These small, inexpensive silicone or rubber stoppers fit snugly into your charging port, headphone jack, and sometimes even speaker grilles, creating a barrier against sand, dust, and lint. Additionally, investing in a protective case for your device, especially one with port covers, can significantly reduce the risk of sand infiltration. When at the beach or in sandy environments, always avoid placing your devices directly on the sand. Keep them in a sealed bag, a designated pouch, or elevated on a towel. After a sandy outing, make it a habit to gently wipe down your devices with a microfiber cloth before putting them away.
When to Call in the Professionals
While the DIY methods outlined above are effective for most common sand blockages, there are times when professional intervention is necessary. If, after carefully attempting all the recommended cleaning steps, sand still remains or your speaker’s sound quality doesn’t improve, it’s time to seek expert help.
You should also consult a professional if you notice any signs of physical damage during the cleaning process, such as a pierced speaker membrane or loose components. Furthermore, if your device shows signs of water damage in addition to sand (especially from saltwater, which is highly corrosive), immediate professional attention is crucial to prevent further internal damage. Repair technicians have specialized tools and expertise to safely disassemble your device, clean it thoroughly, and replace any damaged parts without risking further harm to sensitive electronics.
Conclusion
Encountering sand in your speaker ports can be frustrating, but with the right approach, it’s a manageable problem. By carefully following gentle tapping, utilizing high-frequency vibrations, judiciously applying compressed air, and employing soft brushes or adhesive putty, you can effectively dislodge most sand particles and restore your audio. Remember the golden rules: always turn off your device, be gentle, and avoid invasive tools or liquids. Proactive measures like using port plugs and protective cases can significantly reduce the likelihood of sand ingress, keeping your devices sounding pristine. If, despite your best efforts, the issue persists or damage is suspected, don’t hesitate to consult a professional. What’s your go-to trick for keeping your speakers sand-free after a beach day?
Frequently Asked Questions
Can sand permanently damage my speaker?
Yes, sand can permanently damage your speaker if not removed carefully and promptly. Abrasive sand particles can scratch or tear the delicate speaker membrane, causing irreversible distortion or complete failure. It can also interfere with internal components if forced deeper into the device.
Is it safe to use compressed air on my phone speaker?
Using compressed air can be safe if done correctly. Hold the can upright, use short, gentle bursts from a few inches away, and never spray directly at full force. Improper use, such as holding the can too close or spraying liquid propellant, can push sand deeper or damage sensitive parts.
How can I prevent sand from getting into my speaker in the first place?
To prevent sand ingress, consider using protective port plugs for all openings and a sturdy case with port covers. Always keep your device elevated off sandy surfaces, perhaps in a sealed bag or on a towel, and gently wipe it down after being in a sandy environment.
What if sand is still stuck after trying these methods?
If sand remains despite trying all the recommended methods, it’s best to seek professional help. A qualified technician has the tools and expertise to safely open your device, remove stubborn particles, and repair any underlying damage without risking further harm to delicate electronics.
Can I use a vacuum cleaner to remove sand from speakers?
Using a vacuum cleaner to remove sand from speakers is generally not recommended. While it might seem intuitive, the suction can be too powerful and potentially damage internal components or even pull them out of place. Stick to gentler, more controlled methods.
How long does sand take to cause damage to a speaker?
Damage from sand can occur almost immediately upon exposure, especially if the device is shaken or used while sand is present, allowing particles to grind against delicate components. However, noticeable sound degradation or functional issues might develop over time as more sand accumulates or is forced deeper.