Imagine enjoying your favorite tunes by the pool, singing along in the shower, or simply having your music accompany you on a rainy hike without a second thought. For many speakers, however, a single splash can spell disaster, turning your perfect soundtrack into a costly repair. The good news is, you don’t always need to invest in an expensive waterproof speaker to achieve peace of mind. With a few simple DIY techniques and the right materials, you can significantly enhance your speaker’s water resistance right at home. This guide will walk you through practical, step-by-step methods to protect your beloved audio companion from the elements, ensuring your music never has to stop, no matter where life takes you.
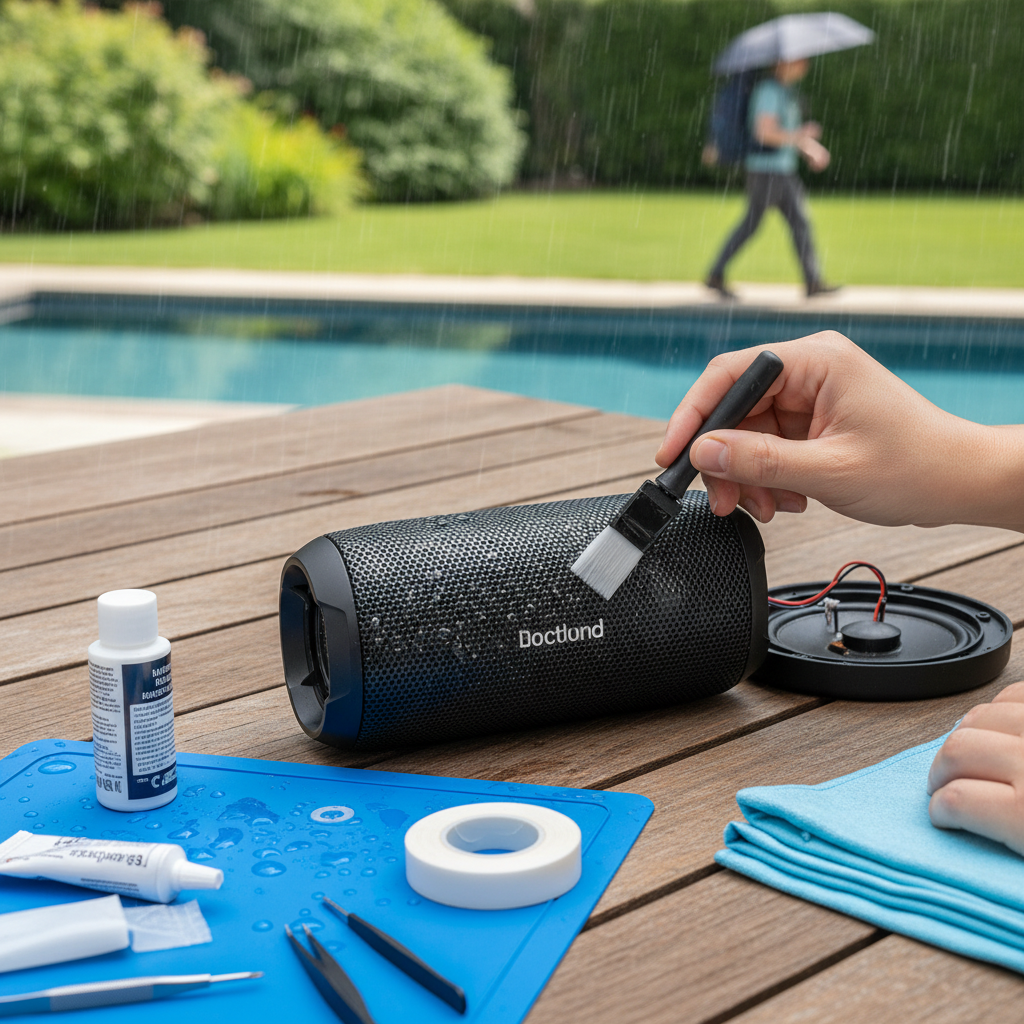
Why Waterproof Your Speaker? Understanding the Need for Protection
The desire to integrate music seamlessly into all aspects of life is stronger than ever. Whether you’re an outdoor enthusiast, a home chef who loves kitchen tunes, or someone who enjoys a concert in the shower, the risk of water damage to your electronics is a constant concern. Speakers, with their exposed drivers and numerous ports, are particularly vulnerable.
Waterproofing your speaker offers several key benefits. It extends the lifespan of your device, protecting its delicate internal components from corrosion and short circuits. It also dramatically expands the environments where you can safely use your speaker, transforming it from an indoor-only device to a versatile companion for any adventure. By understanding the difference between “waterproof” and “water-resistant” and what IP ratings signify, you can set realistic expectations for your DIY project. A truly waterproof device, often with a high IPX7 or IPX8 rating, is designed for submersion, while a water-resistant one can withstand splashes, rain, or light exposure. Your DIY efforts will typically aim for enhanced water resistance, offering robust protection against common moisture threats.
Understanding Speaker Vulnerabilities
Before diving into waterproofing, it’s essential to pinpoint where water can enter and damage your speaker. Most speakers have several weak points that need attention:
- Ports and Inputs: Charging ports (USB, DC in), AUX jacks, and memory card slots are open pathways for water.
- Buttons and Controls: The tiny gaps around physical buttons can allow moisture to seep into the internal circuitry.
- Seams and Joints: The lines where different parts of the speaker casing meet often have microscopic gaps or aging seals that can fail.
- Speaker Cones/Drivers: While the cone material itself might be somewhat water-repellent, the area where the cone attaches to the frame, or where the voice coil sits, can be susceptible.
- Speaker Grills: Mesh or fabric grills, while protective against debris, offer little to no barrier against water without additional treatment.
- Internal Circuitry: The delicate circuit boards and wiring inside are highly sensitive to moisture and can easily short-circuit if exposed.
Addressing these vulnerable areas systematically is key to successful DIY waterproofing.
DIY Waterproofing Methods: A Comparative Overview
Several DIY approaches can bolster your speaker’s defenses against water. Each method varies in effectiveness, cost, and complexity.
| Method | Description | Pros | Cons | Ideal Use Case |
|---|---|---|---|---|
| Sealing External Gaps | Applying silicone or rubber sealants around ports, seams, and buttons. | Targeted protection, relatively easy, inexpensive. | May not withstand submersion, can be messy, semi-permanent. | Splash-proof for showers, light rain, kitchen use. |
| Protecting Speaker Cones | Applying waterproof sprays or coatings to speaker cones and grills. | Improves cone’s water repellency, minimal aesthetic change. | Can affect sound quality (especially thicker coatings), requires reapplication. | Light splashes, high humidity. |
| Protective Enclosures/Cases | Using a waterproof container or building a custom waterproof box. | Best protection for submersibility (with proper sealing). | Can muffle sound, less portable, requires more DIY skill. | Poolside, boating, heavy rain, temporary submersion. |
| Internal Component Coating | Spraying conformal coating on circuit boards. | Comprehensive internal protection. | Voids warranty, complex, risk of damage if done incorrectly. | Advanced users, high-humidity environments (not submersion). |
Method 1: Sealing External Gaps and Ports
This is often the first line of defense and a relatively straightforward way to protect your speaker from splashes and light rain.
Materials You’ll Need:
- Silicone-based sealing compound (e.g., clear silicone caulk, electronic-grade silicone sealant)
- Rubbing alcohol or electronics cleaner
- Soft, dry cloth
- Rubber or silicone plugs (for unused ports)
- Small applicator tools (cotton swabs, toothpicks, or sealant nozzle)
|
Our Picks for the Best Bluetooth speaker in 2026
As an Amazon Associate I earn from qualifying purchases.
|
||
| Num | Product | Action |
|---|---|---|
| 1 | JBL Go 4 - Ultra-Portable, Waterproof and Dustproof Bluetooth Speaker, Big JBL Pro Sound with Punchy bass, 7-Hour Built-in Battery, Made in Part with Recycled Materials (Blue) |

|
| 2 | Portable Bluetooth Speaker, IPX7 Waterproof Wireless Speaker with 20W Loud Stereo Sound, 15H Playtime & Beat-Synced RGB Light, Small Outdoor Speaker for Shower, Pool, Beach, Hiking and Gifts |
|
| 3 | JBL FLIP 5, Waterproof Portable Bluetooth Speaker, Black, Small |
|
| 4 | Monster S620 Bluetooth Speaker, Wireless Portable Outdoor Bluetooth Speakers, 60W True Wireless Stereo IPX8 Waterproof, Dual PairingBluetooth 5.4 Built-in Mic, Perfect for Home, Blue |
|
| 5 | JBL Go 3 - Portable Mini Bluetooth Speaker, big audio and punchy bass, IP67 waterproof and dustproof, 5 hours of playtime, speaker for home, outdoor and travel (Black) |
|
| 6 | Soundcore Boom 2 By Anker, Outdoor Speaker, 80W, Subwoofer, BassUp 2.0, 24H Playtime, IPX7 Waterproof, Floatable, RGB Lights, USB-C, Custom EQ, Bluetooth 5.3, Portable for Camping and Beach - Black |
|
| 7 | BolaButty Bluetooth Speaker with HD Sound, Portable Wireless, IPX5 Waterproof, Up to 20H Playtime, TWS Pairing, BT5.3, for Home/Party/Outdoor/Beach, Electronic Gadgets, Birthday Gift (Black) |
|
| 8 | Bose SoundLink Flex Bluetooth Speaker (2nd Gen) - Portable Outdoor Speaker with Hi-Fi Audio, Waterproof and Dustproof, USB-C, Up to 12 Hours Battery Life, Twilight Blue - Limited Edition Color |
|
| 9 | JBL Charge 6 - Portable Waterproof & Drop-Proof Bluetooth Speaker, Bold JBL Pro Sound with AI Sound Boost, 28Hrs of Playtime, Built-in powerbank & Comes with a Sturdy/Removable Carrying Strap (Black) |
|
| 10 | Anker Soundcore 2 Portable Bluetooth Speaker, 12W Stereo Sound with Deep Bass, IPX7 Waterproof, 24-Hour Playtime, Built-in Mic, for Home, Outdoors & Travel |
|
Step-by-Step Guide:
- Clean Your Speaker Thoroughly: Wipe down the entire speaker exterior with a soft, dry cloth. For areas around ports and seams, use a small amount of rubbing alcohol on a cotton swab to remove any dust, grime, or oils that could prevent the sealant from adhering properly. Ensure the surface is completely dry before proceeding.
- Identify Vulnerable Areas: Carefully inspect your speaker for any visible seams, cracks, button edges, and charging or auxiliary ports. These are your primary targets for sealing.
- Apply Silicone Sealant:
- Ports: Apply a thin, even bead of silicone sealant around the edge of each port. Use a toothpick or cotton swab to carefully smooth the sealant, ensuring full coverage without blocking the port’s functionality. For ports you don’t frequently use, consider inserting a dedicated rubber or silicone plug and then sealing around the plug for an extra layer of protection.
- Buttons: Gently apply a tiny amount of sealant around the circumference of each button. Be very careful not to get sealant under the button or in any way hinder its movement or responsiveness. Less is often more here.
- Seams: Follow any visible seams or joints in the speaker casing with a thin line of sealant. Smooth it out with your finger or a damp cloth for a clean finish.
- Allow Ample Curing Time: Silicone sealants require time to cure completely. Refer to the product’s instructions, but generally, allow several hours (or even 24 hours) for the sealant to dry and form a durable, waterproof barrier. Avoid using or exposing the speaker to water during this period.
Method 2: Protecting Speaker Cones and Grills
While external sealing protects the casing, the actual speaker cones and grills also need consideration, especially for open-design speakers.
Materials You’ll Need:
- Waterproofing spray for fabrics/footwear (e.g., silicone-free water repellent)
- Liquid rubber spray (e.g., PlastiDip, Flex Seal) – Use with caution, see note below.
- Painter’s tape or masking tape
- Old newspaper or drop cloth
- Rubbing alcohol and cloth
Step-by-Step Guide:
- Clean and Prepare: Gently clean the speaker cones and grills, ensuring they are free of dust and debris. Use painter’s tape to mask off any areas you do not want to spray, such as the speaker casing, control panel, or ports. Cover surrounding areas with newspaper to protect from overspray.
- Choose Your Spray Wisely:
- Fabric/Footwear Waterproofing Spray: For a subtle, breathable water-repellent layer, these sprays are a good option. They are generally lightweight and less likely to affect sound quality.
- Liquid Rubber Spray (Caution Advised): Products like PlastiDip or Flex Seal create a more robust, rubberized coating. While highly effective at repelling water, they add mass to the speaker cone, which can noticeably alter sound characteristics, particularly reducing efficiency. They also tend to be less breathable, potentially trapping moisture. If using, spray in very thin, even coats.
- Test First: Always test your chosen spray on an inconspicuous area of the speaker, or ideally, on a spare speaker cone or similar material, to observe its effect on both appearance and potential sound impact before applying it to your main speaker.
- Apply Thin, Even Coats: Following the manufacturer’s instructions, apply the spray in several thin, even coats. Avoid thick applications, especially with liquid rubber, which can lead to drips and negatively impact sound. Allow each coat to dry completely before applying the next.
- Curing Time: Let the speaker dry for the recommended curing time before reassembling or exposing it to moisture.
Method 3: Building a Protective Enclosure or Case
For the most robust DIY protection, particularly against heavy rain or accidental submersion, a dedicated enclosure or case is your best bet.
Materials You’ll Need:
- Waterproof container (e.g., durable plastic box, Pelican-style case, marine-grade plywood)
- Silicone sealant
- Epoxy or strong waterproof adhesive
- Weatherstripping or rubber gaskets
- Marine-grade speaker wire (if routing wires externally)
- Tools: Saw, drill, sandpaper, clamps (depending on enclosure type)
Step-by-Step Guide (General):
- Select or Build Your Enclosure:
- Pre-made Waterproof Case: The simplest option. Choose a case that comfortably fits your speaker, with enough room for internal padding.
- Custom Plastic Enclosure: Purchase a sturdy plastic box. You’ll cut openings for your speaker and controls.
- Marine-Grade Plywood Box: For a more permanent and robust solution, construct a box from marine-grade plywood. This material is designed to resist moisture and rot. Ensure all cuts are precise.
- Plan Component Placement: Decide where your speaker drivers, controls, and any necessary ports (like a charging passthrough) will be located on the enclosure. Mark these areas carefully.
- Cut and Seal Openings:
- For Speaker Drivers: Cut precise openings for your speaker drivers. When mounting, use silicone sealant or a rubber gasket between the speaker frame and the enclosure to create a watertight seal. Secure with waterproof screws or bolts.
- For Controls/Ports: Drill small holes for any external buttons or charging passthrough cables. Seal these meticulously with silicone sealant or epoxy, possibly using marine-grade cable glands for wires.
- Seal All Joints and Seams: If building a box from scratch, apply generous amounts of silicone sealant or epoxy to all internal and external joints and seams. Use clamps to hold pieces together while the adhesive cures.
- Add Gasketing: For removable lids or access panels, apply weatherstripping or rubber gaskets along the sealing edges to ensure a compression-tight, waterproof seal when closed.
- Ensure Sound Pass-Through: If using a completely enclosed box, consider how sound will escape. Some DIYers integrate waterproof fabric or mesh over the speaker output area, sealed tightly around the edges, to allow sound while blocking water.
- Cure and Test: Allow all sealants and adhesives to cure fully according to their instructions.
Method 4: Protecting Internal Components (Advanced)
For the adventurous DIYer seeking maximum protection, coating internal circuit boards can be considered, but comes with significant risks.
Materials You’ll Need:
- Conformal coating spray (specifically for electronics)
- Small brushes or applicators
- Precision screwdriver set (to disassemble speaker)
- Rubbing alcohol and soft brush (for cleaning)
Step-by-Step Guide:
- Disassemble Speaker (Caution!): Carefully open your speaker to expose the circuit boards. Be aware this will almost certainly void your warranty and carries a risk of damaging the speaker. Document each step with photos.
- Clean Components: Gently clean circuit boards with rubbing alcohol and a soft brush to remove dust or corrosion. Ensure they are completely dry.
- Apply Conformal Coating: In a well-ventilated area, apply the conformal coating in thin, even layers to the circuit board. Avoid spraying connectors, buttons, or moving parts that need to remain conductive. Follow the product’s specific instructions for application and drying times. This coating creates a thin, protective barrier against moisture.
- Reassemble: Once fully cured, carefully reassemble your speaker.
Cost Analysis of DIY Speaker Waterproofing
DIY waterproofing can be a cost-effective alternative to buying a new, purpose-built waterproof speaker, with costs varying significantly based on the chosen method:
- Low-Cost (under $20): Silicone sealant, rubber plugs, and basic waterproofing spray are very affordable. This option provides good splash resistance.
- Mid-Range ($20-$100): Investing in a high-quality pre-made waterproof case or marine-grade plywood for a custom enclosure falls into this category. This can offer much greater protection, including for submersion.
- High-End DIY ($100+): If you’re building a complex, robust outdoor speaker system from scratch with marine-grade components, waterproof wiring, and advanced coatings, costs can rise but will still likely be less than a comparable commercial unit.
Compared to professional waterproof speakers which can range from $50 to several hundreds of dollars, DIY methods offer significant savings, especially for minor protection needs.
Testing Your DIY Waterproof Speaker
After all your hard work, thorough testing is crucial to ensure your efforts have paid off and to identify any remaining weak points.
- Visual Inspection: Before any water, carefully re-examine all sealed areas. Look for any gaps, bubbles, or spots where the sealant might not have adhered properly.
- The Gentle Splash Test: Start with a light splash test. Fill a sink or bucket with a small amount of water and gently splash water onto the speaker. Immediately check for any signs of water ingress around ports, seams, and buttons. Dry the speaker thoroughly.
- The Rain Test (Simulated): If you’ve aimed for rain resistance, use a spray bottle to simulate light rain over the speaker for a few minutes. Again, check for moisture.
- The Submersion Test (for Enclosures Only, with Caution): If you’ve built a fully sealed enclosure, you can perform a brief submersion test. Crucially, do this WITHOUT the speaker inside first. Submerge the empty sealed enclosure in water for a short period, then remove and check for any leaks. Once confident, place your speaker inside (ensure it’s completely dry) and try a very short, shallow submersion. Monitor closely for any issues.
- Post-Test Examination: After each test, allow the speaker to dry completely. Play music to ensure sound quality hasn’t been adversely affected and that all functions remain operational.
“A common mistake DIYers make is overconfidence. Even with careful sealing, always test in a controlled environment before trusting your speaker in extreme conditions. Small leaks can become big problems.”
Maintenance for Prolonged Waterproofing
DIY waterproofing isn’t a “set it and forget it” solution. Regular maintenance will ensure your speaker remains protected for longer.
- Regular Inspections: Periodically check all sealed areas, gaskets, and coatings for cracks, peeling, or general wear and tear. Look for any signs of degradation caused by UV exposure, temperature changes, or physical impact.
- Reapplication/Repair: If you notice any compromised areas, clean them thoroughly and reapply sealant or coating as needed.
- Clean After Use: After using your speaker in wet or dusty conditions, wipe it down with a dry cloth. For saltwater exposure, rinse gently with fresh water and dry completely to prevent salt buildup and corrosion.
- Proper Storage: Store your speaker in a dry, temperate environment when not in use. Avoid prolonged exposure to direct sunlight or extreme temperatures, which can degrade waterproofing materials.
Conclusion
Empowering yourself to waterproof your speaker DIY opens up a world of possibilities for your music enjoyment. From a simple silicone seal for splash protection to a robust custom enclosure for adventurous outings, these methods allow you to extend your speaker’s life and utility without breaking the bank. While no DIY solution can perfectly replicate factory-grade waterproofing, by carefully selecting materials, meticulously applying them, and consistently maintaining your work, you can achieve significant protection against the elements. Embrace the satisfaction of creating a more versatile audio experience for yourself. What exciting new places will your waterproofed speaker take you?
Frequently Asked Questions
Can I use Flex Seal or PlastiDip to waterproof my speaker?
Yes, liquid rubber sprays like Flex Seal or PlastiDip can be used for waterproofing, especially on speaker cones or outer casings. However, be aware that applying these coatings can add mass to the speaker cone, potentially altering sound quality by reducing efficiency or changing frequency response. Always apply in very thin, even layers and test on a scrap material first.
How long does DIY speaker waterproofing typically last?
The longevity of DIY waterproofing depends heavily on the method, materials used, and how the speaker is handled. Silicone sealants can last for several years if properly applied and maintained, while spray coatings might need reapplication annually, especially with frequent exposure to harsh conditions or UV light. Regular inspection and maintenance are key to extending protection.
Will DIY waterproofing affect my speaker’s sound quality?
It can. Thicker coatings, especially liquid rubber sprays, can add weight to speaker cones, which may subtly change the speaker’s acoustic properties, potentially affecting bass response or clarity. Additionally, some enclosures might muffle sound. The goal is to balance protection with minimal audio impact, often favoring thin applications and well-designed enclosures.
Is DIY waterproofing truly “waterproof” or just “water-resistant”?
For most DIY projects, the result will be enhanced “water resistance” rather than true “waterproofing.” Achieving a factory-grade, submersion-proof seal (like an IPX7 rating) often requires specialized materials, precise manufacturing, and rigorous testing that are challenging to replicate at home. DIY methods are excellent for protecting against splashes, rain, and high humidity.
What is an IP rating, and how does it relate to speaker waterproofing?
An IP (Ingress Protection) rating is an international standard that classifies the degree of protection provided by electrical enclosures against solid objects (like dust) and liquids (like water). The first digit indicates protection against solids, and the second against liquids. For example, IPX7 means no protection against solids but protection against temporary immersion in water (up to 1 meter for 30 minutes).